How to Clean Up Your Startup Disk Macbook Pro
How to fix the "Startup Disk Full" error on your Mac
As of 2020, Mac hard drives are as spacious as ever. The maximum hard drive size you can currently get is 8 TB but sorry, that's a Mac Pro. Another issue is the macOS itself. The modern macOS versions, like macOS Big Sur, are increasingly browser-oriented, aiming to perform most of the work online, thus reducing the toll on your hard drive. But where is our disk space going then?
One answer is hidden website cache. Artem Russakovskii from Android Police spotted that Chrome creates notoriously large cache folders even after you've visited seemingly simple sites, like eaze.com. In some cases, it was 9GB worth of cache collected from one site alone. So these days, it's essential to know how to clean the startup disk on Mac. Because there comes a day in the life of every Mac user when the message "Your startup disk is almost full" will hit you hard. But how could a full startup disk affect you?
Let's start with the beginning: what is a startup disk? Well, it's the hard drive that contains your operating system, which makes it the most important disk of all. So when the "Your startup disk is almost full" message pops up, it basically means you are running out of space on your primary disk drive and that is very bad news.
What does it mean when your Mac says the disk is full?
When a Mac startup disk is reaching full capacity it is bad news for two reasons:
-
Soon you'll run out of space entirely.
-
A disk that is full (or even near full) is going to perform slowly.
What most people don't realize, is that their Mac actually converts the available space on their startup disk into virtual memory, which you use for day-to-day operations. Ideally, 10% of the disk should be free to leave your Mac's OS enough space to operate. Therefore, if you're running low on space, you're heading for big problems.
How to check disk space on Mac
To get to the root of the problem and find the solution, you must discover what is taking up all the space on your startup disk drive.
To have an overview on how your space is being used simply follow these steps:
-
Click on the Apple Icon
-
Select About This Mac
-
Click Storage (or More Info > Storage on older Macs)
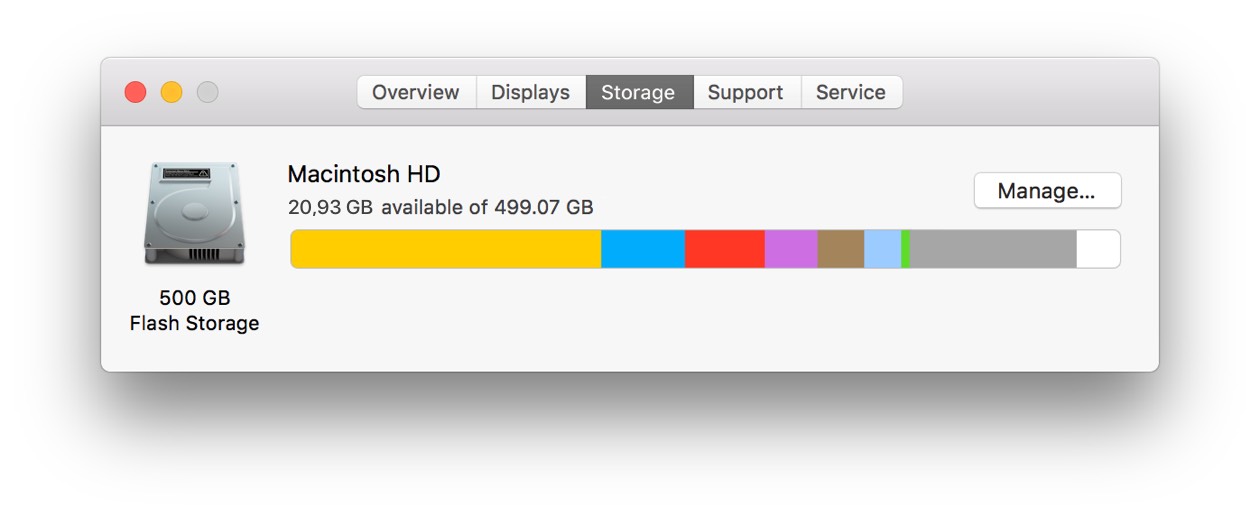
From here you'll be able to see exactly how much space you've got left and what's eating up the used one. If you are running out of available disk space, it's time to delete some files or install a new hard drive.
Luckily, your disk will be full of movies, photos, and audio. Why luckily? Because these files are easy to remove or move to another location. Any external drive or cloud storage will do the trick and your Mac's going to thank you for leaving it space to breathe.
However, there's another scenario in which other data is taking up the free space, with files you cannot or do not want to delete. This situation's a bit trickier, but don't worry. These tips will surely give your Mac some extra space. We've grouped them into two main categories:
-
5 Essential tips to clear startup disk
-
5 Bonus tips to free up disk space
So, let's start fixing your Mac right now.
10 Essential tips to clear the startup disk on a Mac
Believe it or not, one of your Mac's occupations is to create junk. But don't blame it, it's just doing its job. The Mac's system, like all the other operating systems, depends on creating temporary files, caches and backups to perform correctly. However, after this data has done its part, it remains latent on your Mac, killing space for no purpose.
The good news is that it's extremely simple to remove these useless files, freeing up gigabytes and fixing your startup disk full problem, without affecting your personal data.
So here is how you can fix the "Your startup disk is almost full" error message by deleting the files you don't need and never use.

Delete App Cache (System Junk)
The funny thing with cache files is that they are as necessary as they are useless. At first, caches serve a major purpose, as they get created in order to speed up processes. But once that process ends, you're left with temporary junk generated by apps and system processes. Unless you remove them yourself, they will remain on your Mac for long. If you don't, then these temporary files will become a permanent problem for your hard drive, as they will continue to pile up and make your startup disk full.
Fortunately, it's an easy problem to solve, simply by removing them. And don't worry: your apps will soon refresh their caches and be back up to speed in no time.
To remove app cache files and clean up a startup disk, follow these steps:
-
Navigate to Finder > Go > Go to Folder
-
Type in ~/Library/Caches
-
Go into each folder (or just the ones taking up the most space) and delete the files inside
-
Now do the same for /Library/Caches (without the ~)
Note, that there is always a small risk to manually deleting files (you might pick the wrong folder), so consider backing up these folders before you start deleting.
Alternatively, you can clean up all caches in a fraction of the time and with 100% confidence if you download CleanMyMac X . This is how easy it is to delete tons of system junk at the same time using this flow:
-
Download CleanMyMac X and run the app
-
Click on System Junk
-
Click Scan
-
When the scan finishes click Clean

Download Free Version

Take out the Trash
Sometimes we overlook the most obvious solutions because we think the fix must necessarily involve some complex operation. But when there's not enough disk space, Mac can be saved through the simplest trick.
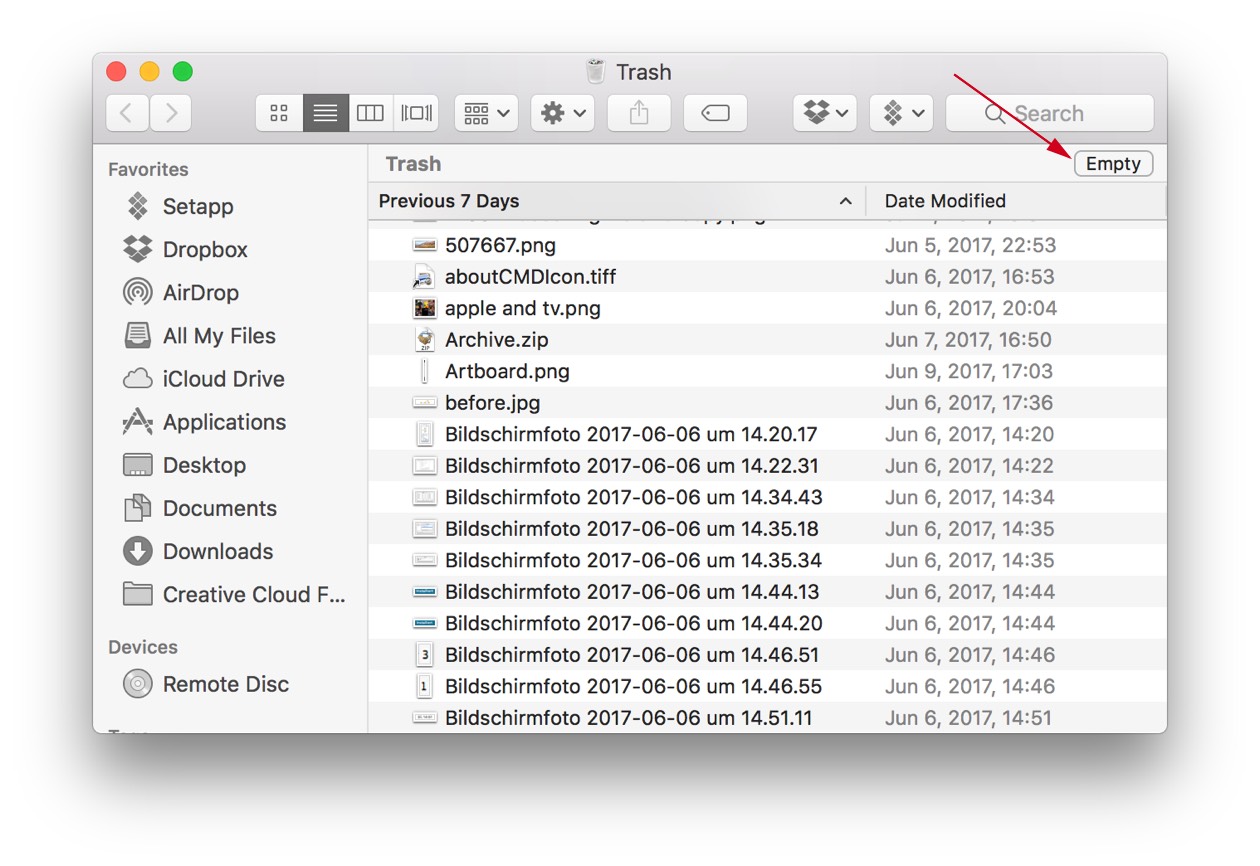
Fact is, your Trash is a graveyard for files you no longer need. Still, these files keep taking up space on your Mac's drive. So, you've probably guessed it: take out the Trash and press "empty" to completely get rid of those piles of useless data.
We're also going to satisfy your need for secret solutions by pointing out something you might have not thought about: every single app has its own trash folder that also stores useless gigabytes. The Mail app is one example, but there are many more. Just like the general Trash, you need to empty these folders in order to actually remove the junk and clear up disk space.
Once you empty all the trash folders in all the apps, you'll be ready to move to the next tip. Ready? Let's go.

Remove Time Machine Backups
We love Time Machine because it creates important backups. But when your Mac can't function due to lack of disk space, there has to be a sacrifice. You can start with removing past Time Machine "snapshots" stored locally on your Mac. So, the first step towards removing the "startup disk full" message is to take care of these backups. Yes, by take care we mean remove them. To do it, all you need is to temporarily turn off your Time Machine.
Open System Preferences > for Time Machine
Uncheck the box next to "Back Up Automatically" 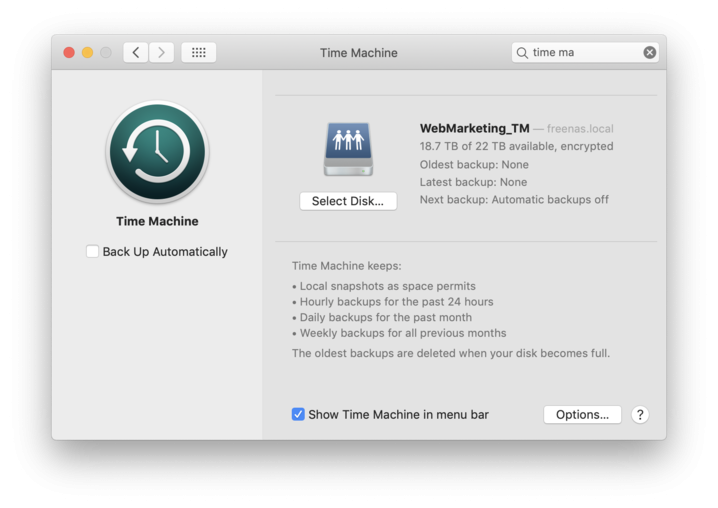
Then, you should give it a few minutes to take effect. Your local Time Machine snapshots will be deleted.

Delete Browser Cache
Your internet browser of choice will create caches every time you visit a new page in order to load it faster at your next visits. However, doing this for every page you visit keeps your browser folder growing enormously, creating a bigger and bigger problem.
So, if you're wondering how to safely clean a startup disk on Mac, removing browser junk is definitely a priority.
In order to remove unnecessary files, check out your browser's way of deleting its cache, as every browser has a different process for removal. However, you will mainly need to follow these steps:
-
Open your browser
-
Open the history tab and tap Clear browsing data
-
Select the files you want to remove: Cookies, site data, Cached images and file
-
Choose from the top menu how far back you want to delete
-
Hit the clear browsing data button
The easy and time saving alternative is to once again fire up the CleanMyMac System Junk tab and locate your browser caches under User Cache Files:


Remove Language Packs
Most of your apps come with language packs (also known as "localization files") that enable you to change the language in the app. It's great to have this option, but let's face it: most people only need one language supported. Maybe two at most. The rest? They're just wasting space.
To delete language packs manually follow these steps:
-
Navigate to Applications
-
Right-click (or ctrl-click) on an app and select Show Package Contents
-
Click on Contents
-
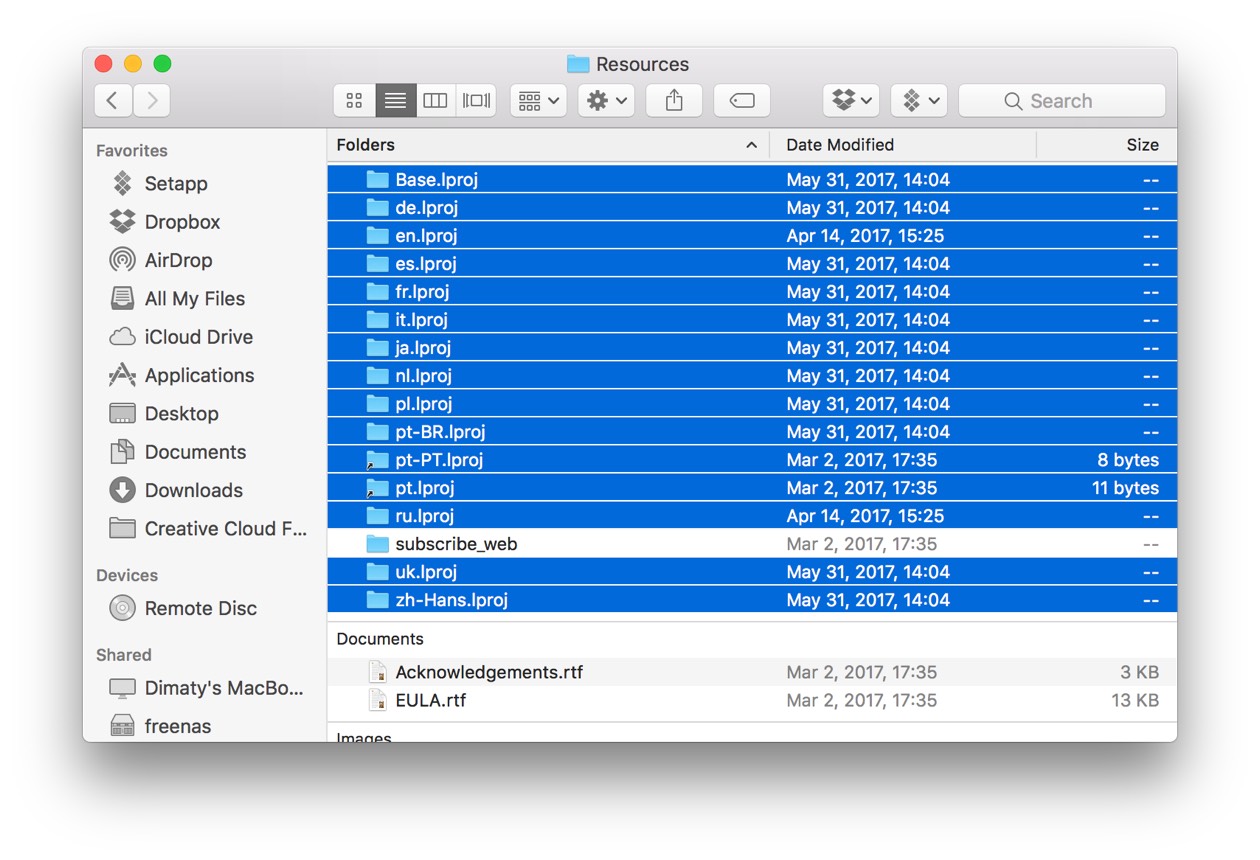
Click on Resources
-
Delete whatever languages (ending in .Iproj) you don't need
-
Repeat for other apps
An even faster way to remove language packs is to use CleanMyMac's System Junk module. After running the scan you can click Review Details and find Language Files. Click on it to see exactly what language packs will be removed. Once you're happy with the selections, click on the big Clean button to further clear your startup disk.
Mac running slow on macOS Big Sur? Try this
Many Mac users reported their Macs being slow after upgrading to macOS Big Sur 11.0. This could be caused by software not yet optimized for Big Sur. Still, there are some things you can try on your Mac to compensate the Big Sur slowdown:
-
Clean up the Desktop clutter — this releases some amount of virtual memory
-
Update all your software
-
Minimize your login items in System Preferences > Users & Groups
-
Disable Dynamic Desktop
-
Use a couple of Mac speed up tools in CleanMyMac X
The latest version of CleanMyMac X has added a set of tools titled "Speed." You can do a lot of things like being able to free up RAM and heavy memory consumers.
Download Free Version
My Mac says there's not enough disk space, but there is
Sometimes, you can't install an update because your system says there's "Not enough disk space" while in fact, you have that space available. This conflict could be attributed to the so-called "purgeable" space. It's basically the space taken by all the unnecessary stuff that can be purged and converted into free storage. One way to free up your purgeable space is to disable iCloud drive optimization.
-
Open your System Preferences >iCloud
-
Check iCloud Drive and choose Options
-
Now, uncheck "Optimize Mac storage"
As you can see, iCloud backups were the part of that "invisible" space on your Mac. It also helps if you empty your Trash — one more purgeable category of storage.
When the available storage is not enough, Mac disk space can also saved by removing the iOS backups.

Remove iOS Backups
Do you own an iPhone or iPad? Have you ever updated those devices using iTunes on your Mac? If the answer is yes, then you most likely have old backups taking up valuable space on your startup disk.
To quickly free up space by removing old iOS backups, do as follows:
-
Navigate to Finder > Go > Go to Folder
-
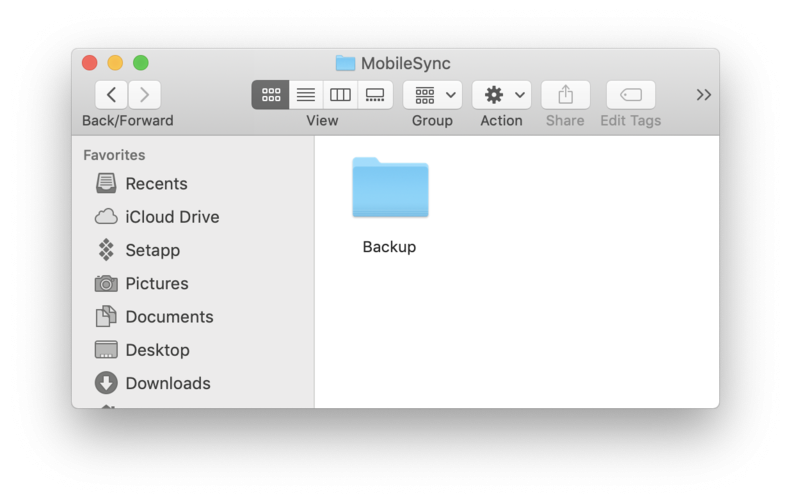
Type in ~/Library/Application Support/MobileSync/Backup/
-
Delete all but the most recent backup

If you're updating your iPhone or iPad through iTunes on your Mac, you're downloading updates for your iOS apps. Once the update has taken place, there is no more need for the update file itself and it just sits hidden on your system with its buddies, wasting your startup disk space.
To remove iOS updates follow these steps:
-
Navigate to Finder > Go > Go to Folder
-
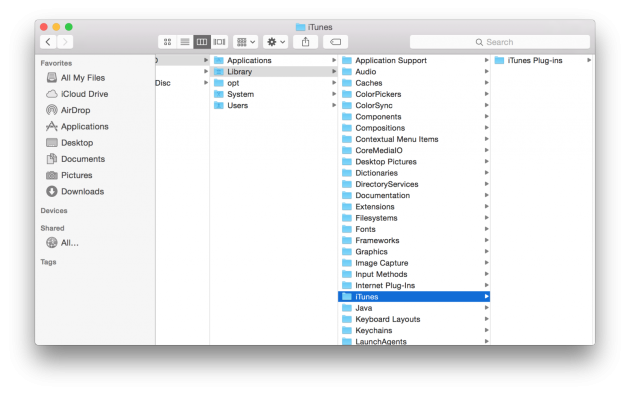
For iPad type in ~/Library/iTunes/iPad Software Updates
-
Go ahead and delete any updates you've already done
-
Now do the same for iPhone at ~/Library/iTunes/iPhone Software Updates

Uninstall Unused Apps
How many apps do you have on your Mac? Let's be honest: how many of them do you actually use?
Most people have at least a handful of apps that they never launched. You might think: so what? But these apps are wasting space, potentially even wasting other resources like RAM if running on background.
So take a moment and have a look through your applications to see if there are some apps you can let go of and remove them for more space and speed. Dragging them to the Trash will uninstall the app, but it will also leave behind lots of hidden files associated with the app, like app logs and crash reports.
To see the list of all your unused apps (and remove them completely) use CleanMyMac's Uninstaller module . For a hard disk it is a great startup cleaner and will free up all of the space that apps were taking up on your Mac.

Download Free Version

Delete Duplicate Libraries from the Photos app
If you made the switch to the new Photos app on your Mac, chances are you've ended up with an old library that holds a bunch of duplicate pictures that take up space for no reason. It's hard to understand why Apple chose to stick with this duplication after the upgrade. We can only assume it's a smart way for them to convince users to buy more iCloud space. Whatever the reason, good news is that now you'll be able to easily remove the duplicate Photos libraries and clear up space. And this is exactly how to do it:
-
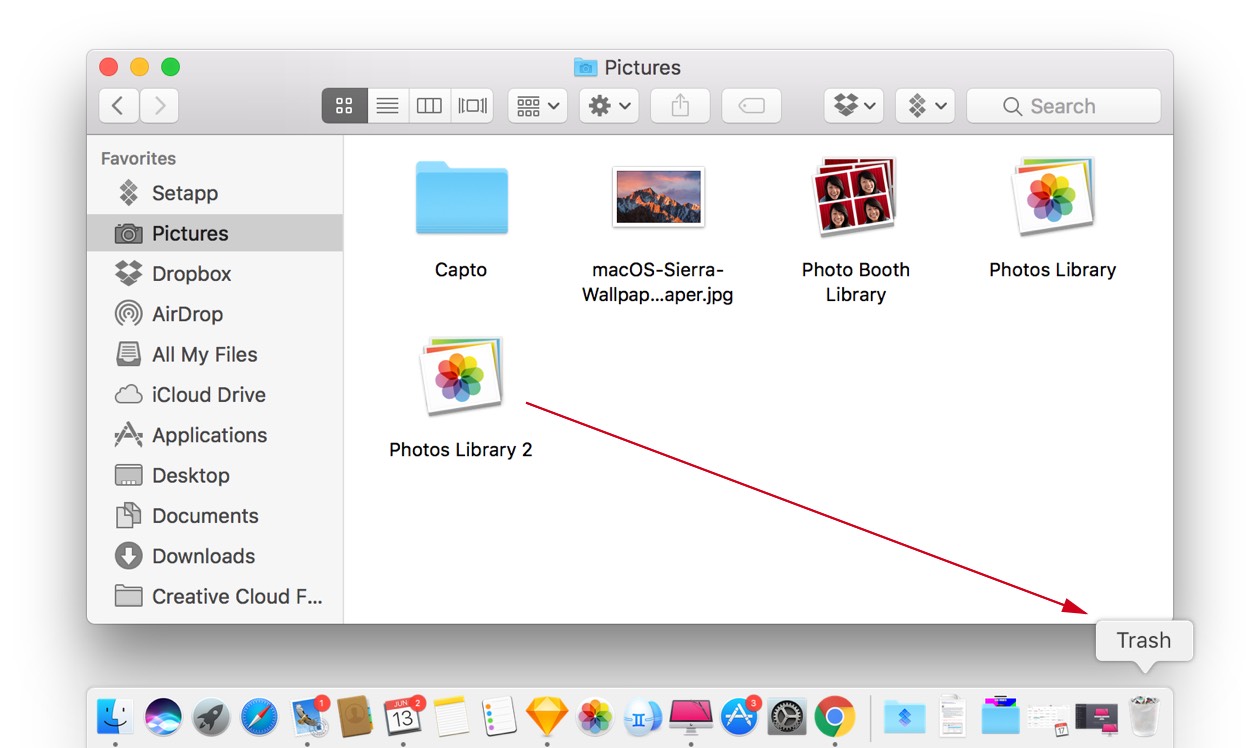
Open Finder and click on Pictures in the left menu
-
If you see two Photos Libraries, simply move the duplicated one to the Trash
-
Note, you may want to backup the folder first, just in case

Limit Dropbox Sync
If you are a Dropbox user, you need to be aware of the fact that Dropbox syncs everything onto your Mac by default. Look through your Dropbox folder and ponder whether or not you need all of those files and folders on your machine.
Probably not.
So here is how you can select which files and folders to sync in order to free up space on your startup disk:
-
Open the Dropbox app
-
Click the gear icon and go to Preferences
-
Select the Account tab
-
Click Change Settings
-
Uncheck files and folders you don't want to be synced to your Mac

No more "Startup disk full" error message
When wondering how to free up space on Mac startup disk, it's hard to tell where to begin. With these 5 essential tips and 5 bonus tips, you have everything you need to get rid of the "Your startup disk is almost full" message for good.
Certain tricks like deleting cache with CleanMyMac and emptying your trash should become part of your routine. This way, your startup disk will be able to focus entirely on smoothly operating your Mac. So bookmark this page and use these tips regularly to ensure the problem never returns.
How to Clean Up Your Startup Disk Macbook Pro
Source: https://cleanmymac.com/fix-mac-startup-disk-full-error
0 Response to "How to Clean Up Your Startup Disk Macbook Pro"
Post a Comment